The Patch That Belongs on the Outside
Visible mending turns a worn garment into a considered repair, with patch placement, fabric, and stitching chosen to make the fix part of its design.
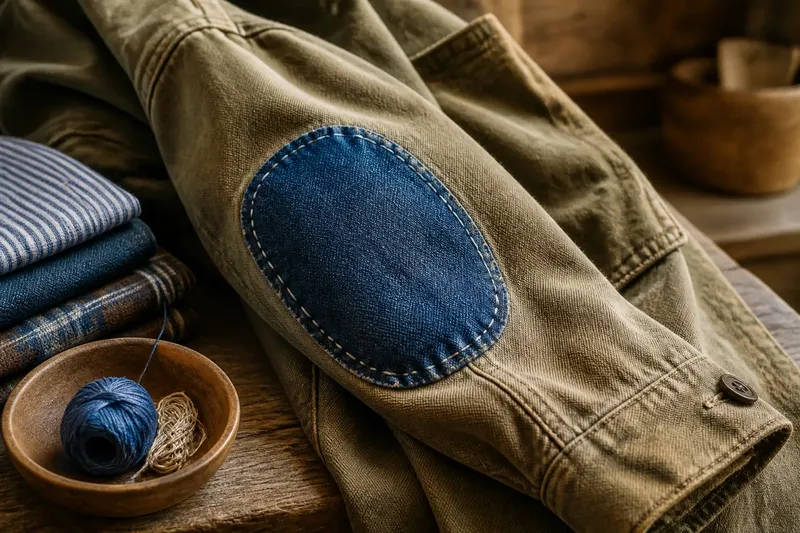
Where should a patch go if you do not want to hide it? Visible mending treats the answer as a design choice: the patch sits on the outside, where its fabric and stitches can be seen. A worn elbow, split pocket, or thinning knee becomes a place to make a repair that is both useful and deliberately legible.
Repair as a visible choice
Clothing has long been repaired with whatever suitable fabric and thread a household could spare. A patch might be cut from a worn-out shirt, a flour sack, or the sound part of another garment. Its original purpose was practical: cover weak cloth, keep a tear from spreading, and make a garment usable again.
That practical history is not the same as one fixed tradition of visible mending. Some repairs were neat and discreet; others showed plainly because the patch was applied on top or the available material contrasted with the garment. The appearance often reflected the cloth at hand, the location of the damage, and the time available—not a single shared style.
Today, a maker can choose contrast on purpose. A patch in a different color, a visible running stitch, or a carefully repeated shape can make the repair look intentional. The point is not to pretend that damage is decorative; it is to let the work of keeping a garment in use become part of its appearance.
Start by deciding whether you want the patch to blend, contrast, or sit somewhere between the two.
Choose the patch site
Look at the garment while it is being worn, not only spread flat on a table. Fabric pulls and folds around elbows, knees, pockets, cuffs, and seat seams. A patch that looks centered on a tabletop may shift visually once the garment bends.
Check the cloth around the hole as well as the hole itself. If the surrounding area is thin, a small patch placed only over the opening may leave fragile fabric carrying all the strain at its edge. A broader patch can distribute the repair across sounder cloth. Avoid placing a bulky patch directly on a seam or pocket opening if it would interfere with movement or access.
Use a scrap of paper to sketch a patch shape, then hold it against the garment. Rounded corners are less likely to catch than sharp points, and an oval or rectangle can follow the direction of a tear. There is no need for perfect symmetry: a shape that responds to the worn area often looks more at home than a decorative shape imposed on it.
Match cloth to wear
Choose patch fabric with the garment’s use in mind. A light woven cotton can suit a shirt, while sturdy denim may be more appropriate for work trousers. A patch that is much stiffer or heavier than the garment can make a soft area buckle; a very light patch may not support a high-wear spot.
Consider how both fabrics behave when washed and handled. If the scrap is new, prewashing it can reduce later changes in size or color. Check its grain—the direction in which the threads run—and place it so that it does not pull awkwardly against the garment. For knitwear, a woven patch can feel rigid, so a compatible knit scrap or flexible darning may sit more comfortably.
Say you have a faded canvas jacket with a thinning elbow and a sound piece of blue cotton from an old shirt. You could cut a rounded patch large enough to reach beyond the weak area, pin it over the sleeve, and try bending your arm before stitching. If the sleeve still folds comfortably and the blue shape reads clearly against the canvas, the placement is likely to work for both movement and appearance.
Let the stitching show
Visible stitches can outline the patch, secure its center, or do both. A running stitch makes a row of short, readable marks; a blanket stitch gives an edge a defined border. Hand-sewn stitches need not be identical, but keeping their spacing reasonably even helps the patch lie flat and makes the pattern look deliberate.
Choose thread for its role as well as its color. A contrasting thread calls attention to the repair; a near-match lets the patch fabric carry most of the visual effect. Strong thread suited to the garment is more useful than a color choice that strains or cuts the cloth. If you are unsure, test a few stitches in a scrap before working on the garment.
Pin or baste the patch first, then check that the fabric beneath it has not puckered. For a garment that will be washed, secure the patch around its edge and add stitches through the area as needed to keep the layers together. Leave enough flexibility for the garment to move; dense stitching can make a soft elbow or knee feel like a board.
What should you consider?
Can an outside patch be comfortable?
It can be, if the patch fabric and stitching suit the garment’s weight and movement. Check the inside for scratchy thread ends and bulky knots, especially where the patch rests against skin.
Should the patch match the garment?
Matching cloth makes a quieter repair, while contrast makes the work more visible. Either can look considered when the patch shape and stitch placement respond to the garment rather than sitting arbitrarily.
Can a patch go over a seam?
It can, but a thick patch crossing a seam may restrict movement or create a hard ridge. If the damaged area reaches a seam, arrange the patch so it supports the weak cloth without obstructing a pocket, cuff, or other opening.
What if the area keeps wearing through?
A patch may need a broader base or a different repair if the cloth around it is also weak. For valuable or technically constructed clothing, a skilled repairer can assess options that preserve fit and function.
Make contrast feel at home
A visible patch need not imitate a factory finish. Repeat one color from the garment’s buttons, lining, or trim, or use a simple geometric shape that echoes its pockets. A small amount of visual connection helps a contrast patch feel chosen without making every repair look alike.
Another option is to make the stitching the main feature and keep the patch close in color to the garment. A border of contrasting thread can frame a subdued fabric scrap. Conversely, a bright patch with matching thread lets the fabric carry the attention. Pick one element to lead, rather than asking color, shape, and stitch pattern to compete.
Keep a few clean scraps from worn garments before they become unusable. A pocket of saved fabric can offer a useful match in weight and character, and its former life gives the repair a quiet connection to the household’s own clothing.
Wear the repair forward
After stitching, look at the garment from a few steps away and then inspect the inside. The outer view tells you whether the patch sits where you intended; the inside reveals loose ends, rough edges, or a knot that may rub. Try the garment through its ordinary motions before calling the repair finished.
Visible mending is not a promise that a garment will never wear again. It is a way to make a repair readable, suited to the cloth, and pleasant to live with. The patch that belongs on the outside is the one that supports the garment without asking it to disguise its history.
For visible mending, keep the next decision simple: choose a sound scrap, place it where the garment moves comfortably, and let the stitching explain that the repair was intentional.